Browse using the new Vinous website now. Launch →
Printed by, and for the sole use of . All rights reserved © 2015 Vinous Media
Mastering Cast Iron Chicken
BY ERIC GUIDO | MAY 01, 2020
Not just a cool name, Cast Iron Chicken is a huge crowd-pleaser, which also gives the chef (you) the ability to do most of the work beforehand through proper preparation. Also, imagine a perfectly cooked chicken with moist white meat, intensely flavored dark meat, and crispy skin. What’s more, you can build your entire dinner in one large pan. Serve it family-style or plate it; you’ll be everyone’s hero the moment they get to the table.
How is this all possible? It’s the combination of high heat, regulated and evenly distributed through the weighty, density of cast iron, along with applying a technique that many refer to as Spatchcock to your chicken. Fancy names aside, what we’re simply doing is partially deboning and partitioning the bird into even-size pieces that will cook together perfectly.
Sounds like a lot of work, right? Honestly, it’s not. With just a little practice, you’ll find this to be one of the easiest yet deeply satisfying preparations in your arsenal.
So, get your kitchen shears, your sharpest knife, and your favorite cast iron pan, and let’s roast some of the crispiest, most flavorful chicken that you’ve ever tasted.
The video tutorial is packed full of hints and tips to cook the perfect Cast Iron Chicken.
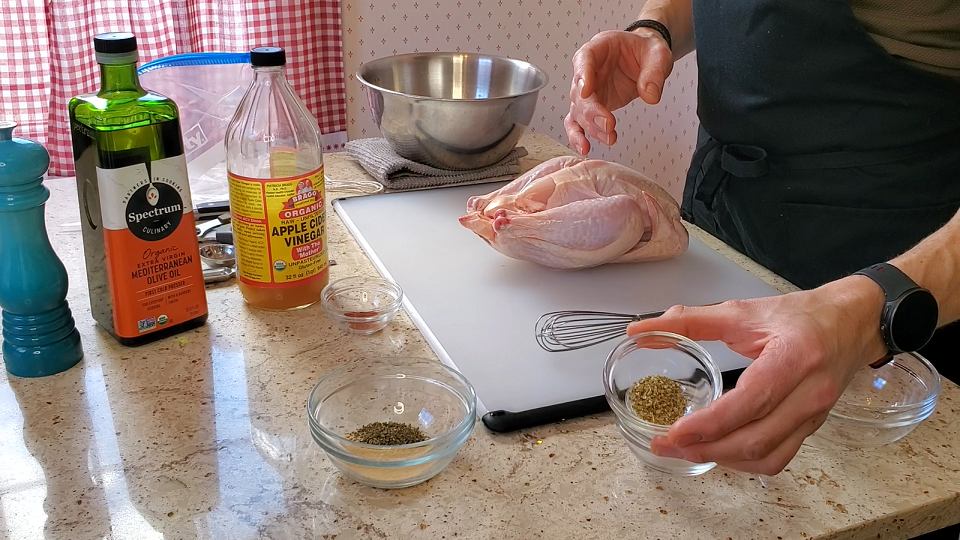
Ingredients:
For the marinade:
1 tbsp garlic granules
1 tsp salt
½ tsp paprika
½ tsp oregano
½ tsp basil
1 tsp apple cider vinegar
3 tbsp extra virgin olive oil
For the pan:
3 ½ - 4-pound chicken
2 - 3 red potatoes (cut to bite-size pieces), tossed with olive oil, garlic granules, paprika, salt, and pepper
3 - 4 stalks of celery (cut to bite-size pieces)
3 - 4 carrots (cut to bite-size pieces)
4 - 6 Shiitake or Portobello mushrooms (quartered)
3 - 4 slices of bacon (halved)
Salt and pepper to taste
Wine Pairings:
Pinot Noir (2016 Montsecano Pinot Noir Casablanca Valley). Find it on Delectable.
Carricante (2014 Terre Nere Etna Bianco Santo Spirito). Find it on Delectable.
Sangiovese (2018 Uccelliera Rosso di Montalcino) Find it on Delectable.
Share your own wine pairings on Delectable and check out what others have paired with cast iron chicken.
Preparing Your Marinade and Your Bird (4-5 hours prior to dinner):
1. In a small bowl, combine the garlic granules, salt, paprika, oregano and basil. Then add your apple cider vinegar and extra virgin olive oil, and whisk together until consistently smooth.
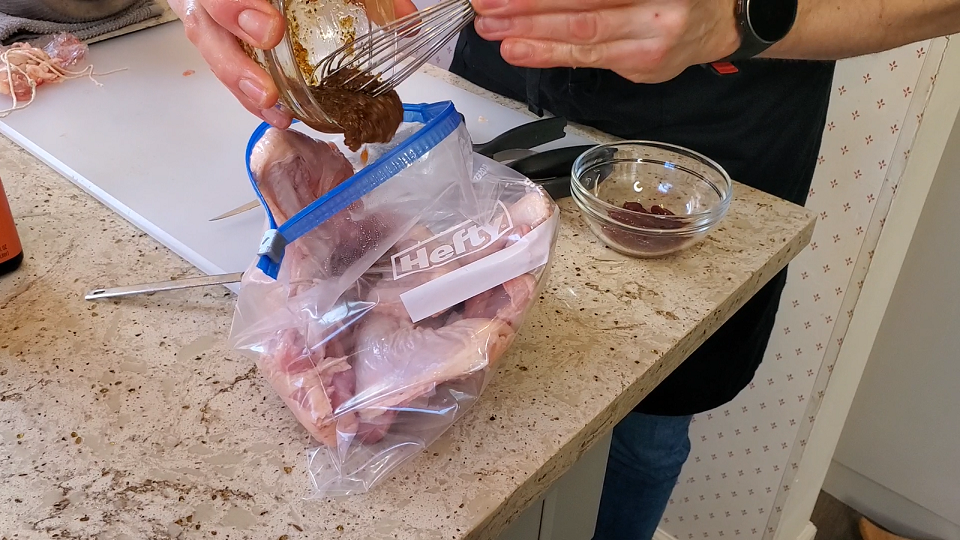
With this marinade, the meat will soak in an intense amount of flavor over a shorter period of time, which will result in an added crispiness to the skin.
2. Now prepare your station; have a large cutting board, a bowl for trimmings, a large Ziploc bag, butcher’s twine (about 18 inches long), a pair of kitchen shears, and a sharp boning knife (or other sharp, thin gauge blade.)
3. Lay the chicken, breast down, and, using the kitchen shears, cut along and through the backbone and ribs along each side of the spine. (Save the spine for stock and also remove any neck or liver reserved inside the bird for later use.)
4. Fold open the spineless bird like a book. You could technically stop paring the bird down here if you like. You’ve achieved Spatchcock, but I prefer to have more control of the pieces.
5. Run a sharp knife under the remaining ribs of the chicken to separate them from the breast meat, and then cut through the breastbone with your kitchen shears to remove them. Repeat this process on both sides of the rib cage. Look for any small bone particles or sharp edges that may be poking out and trim those out as well.
6. Now cut along the skin that attaches the thigh to the chicken, being careful not to remove any skin from the breast. Repeat this with both thighs. The leg and thighs can now be placed into your zip lock bag.
7. With the breast still facing down, tuck the wing tips under the breastbone and tie them with your butcher’s twine. Flip the breast over, and with your hand, fold any skin or meat that is hanging off the breast back underneath, and cross the butcher’s twine across and back under. Flip one more time and tie the twine snuggly.
8. Place the chicken breast into the Ziploc bag.
The chicken will rest in the marinade for 4-5 hours before cooking in the cast iron pan.
9. Stir the marinade one more time and pour it into the Ziploc bag, on top of your chicken.
10. Press as much air as possible out of the bag and seal it.
11. Place this into your refrigerator for at least four hours, flipping it over from time to time to evenly distribute the marinade.
Cast Iron Chicken:
1. Preheat your oven to 450 degrees, with the cast iron pan inside of it. Start this at least 20 minutes prior to cooking, to assure that both the oven and pan are up to full temperature. I like to also add a small cooking grate at the bottom to prevent the vegetables from burning. This is also a good time to take out your chicken and allow it to start coming up to room temperature in a bowl on the side.
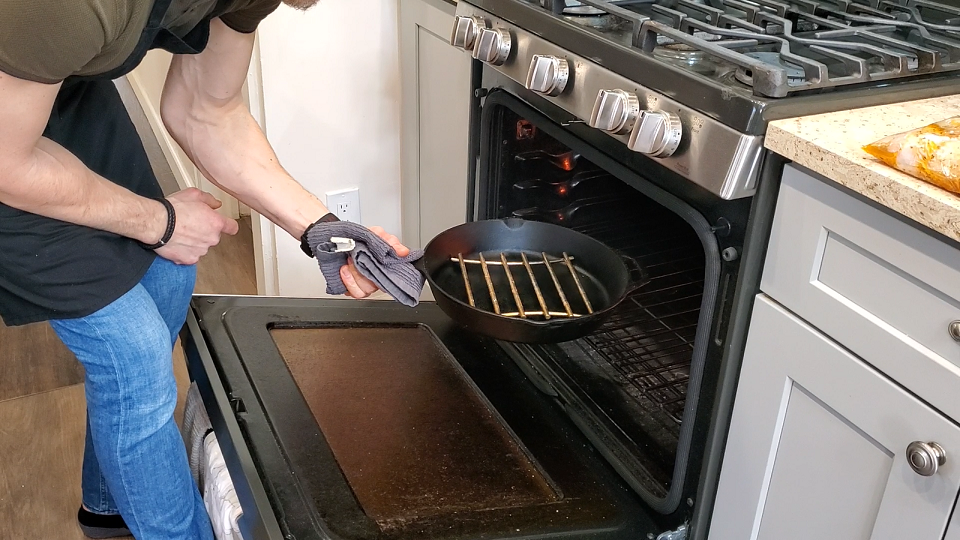
Preheating the cast iron pan in the oven will ensure it warms up evenly.
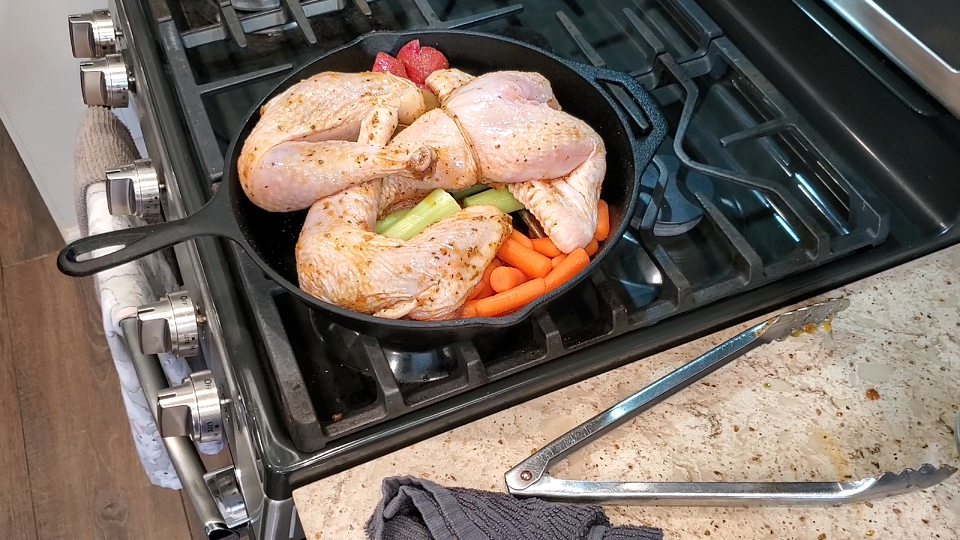
2. Once fully heated, remove the cast iron pan from the oven (careful, it’s hot) and add the potatoes, carrots and celery. I like to keep them as separate as possible.
3. Now lay your chicken breast across the middle and toward the top of the pan.
4. Next add your legs and thighs on both sides, crossing the legs over the thinnest part of the breast. Season generously with salt.
Placing the chicken legs over the smallest part of the breast will prevent the breast meat from overcooking.
5. Place the pan back into the center of your oven, bring the heat down to 435 degrees, and set the timer for 40 minutes.
6. Make sure to check the chicken at around 25 minutes to ensure no parts are taking on more color than others, and if necessary, lay slices of bacon over those areas. Also add your mushrooms to the pan around the edges of the chicken.
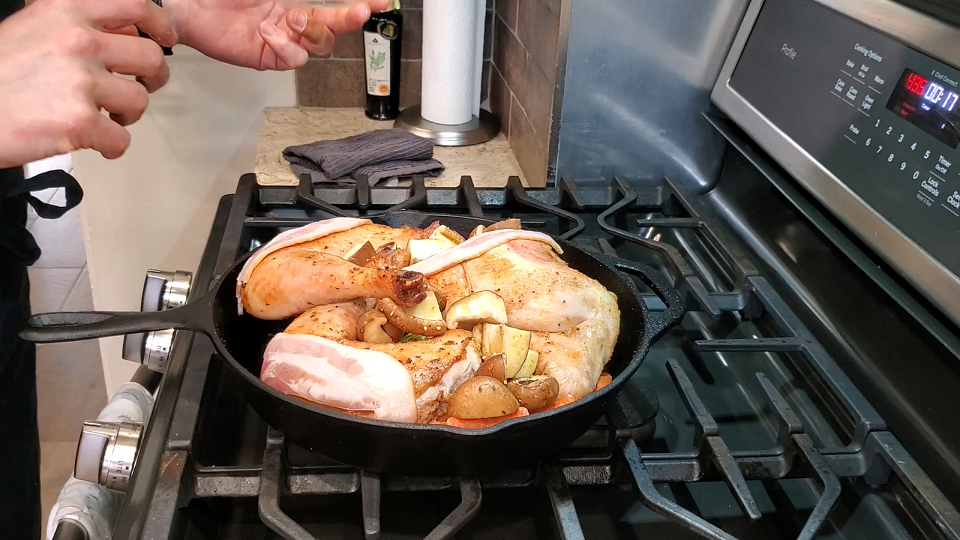
Placing the bacon on top of the skin that is cooking faster is a great way to even out the crispiness of the skin.
7. At 40 minutes, remove your chicken and mushrooms from the oven and take it out of the pan, then cover lightly with aluminum foil. It should rest for 15 to 20 minutes.
8. Return the pan with the vegetables to the stovetop over a high flame, and sauté them in the rendered chicken fat.
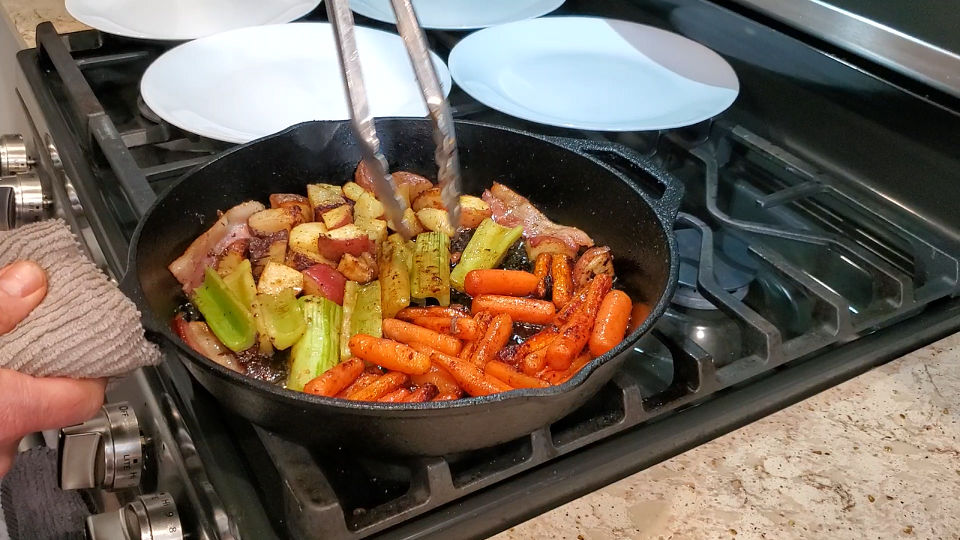
While the chicken is resting, sauté the vegetables and bacon in the rendered chicken fat
9. Once complete, you can plate by placing the roasted vegetables along the sides of a large serving platter and then place the chicken in the middle, for tableside carving, along with the mushrooms and garnish with bacon. Or, you can plate individually, carving the breast, thighs, and legs in the kitchen, and then build individual plates.
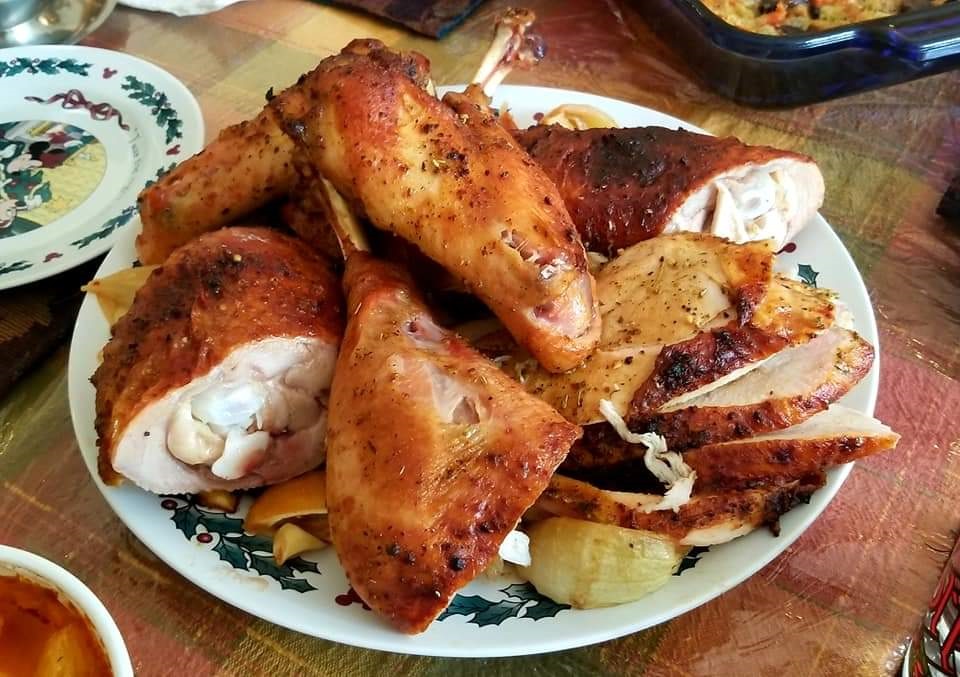
Plate by placing the roasted vegetables along the sides of a large serving platter and then place the chicken in the middle, for tableside carving, along with the mushrooms and garnish with bacon.
You Might Also Enjoy
Vinous in the Kitchen: Jump Start Spring with Asparagus Risotto, Eric Guido, April 2020